
Send emails to contacts
With the Content Creator, you can create, edit, and send emails on all topics included in the Expert package – with just a few clicks. Below you’ll learn how to:
- create an email in the Content Creator,
- edit this email,
- send the email to a selected customer segment,
- and optionally schedule a specific sending time.
Create an Email
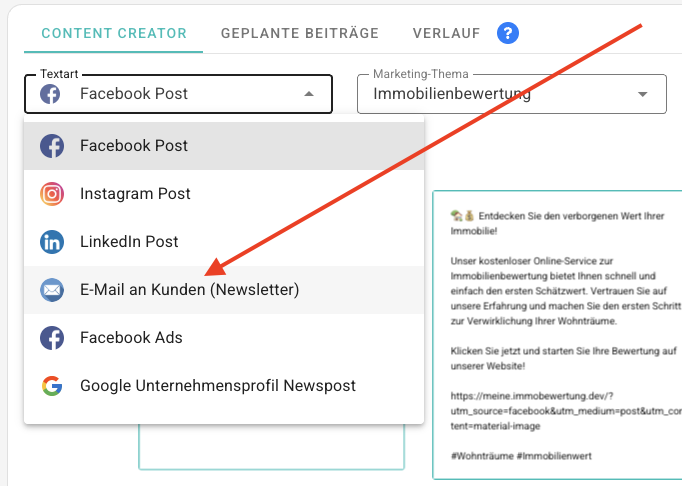
- Open the Content Creator via the navigation menu.
- In the text type dropdown, select “Email to customers”.
- Then choose the desired topic.
A new email will be created automatically. If you’ve already created an email for this topic, simply click “Generate new” to create a new version.
💡 Note:
New topics can be created or added at any time in the Marketing Topics section. They are immediately available in the Content Creator.
Edit the Email
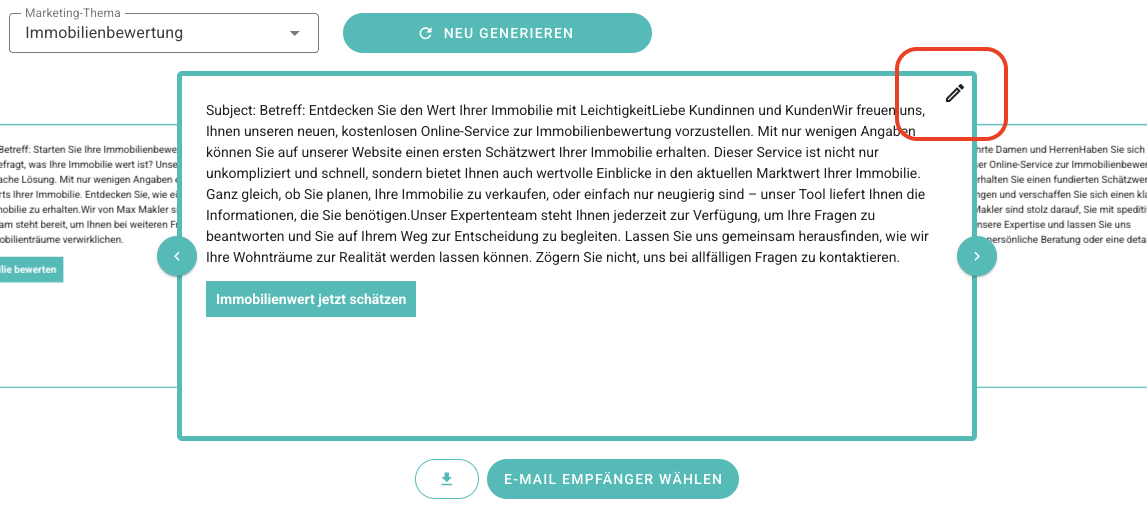
The Content Creator generates high-quality text using state-of-the-art AI language models.
Still, it can be helpful to add your own paragraphs or modify individual phrases. To do this, click the pencil icon at the top right of the generated text. An editing window will open, allowing you to make all changes yourself.
Send the Email
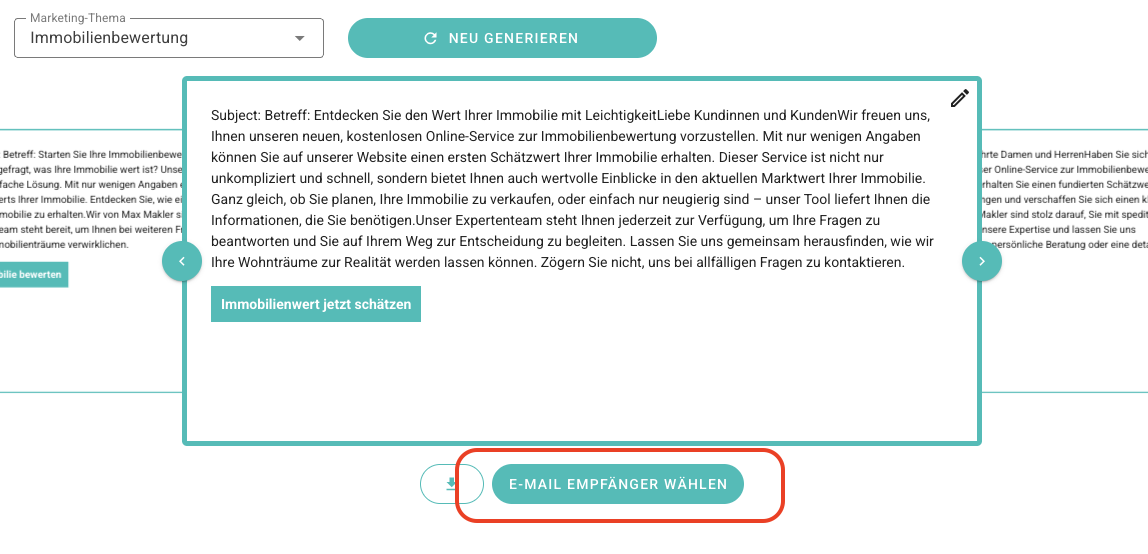
Once the text meets your expectations, the email is ready to be sent. Click the “Select email recipients” button at the bottom.
A window will open where you can choose one of the following contact segments:
- All contacts
- Only new contacts
- All contacts who have evaluated a property
- All contacts who have submitted a purchase request (residential)
- All contacts from your CRM (if you have one connected)
After making your selection, the system will show you how many contacts will receive the email.
Delivery Details
‼️ Good to know:
Unlike the Acquisition Booster (where this would not make sense), you can send emails to the same topic via the newsletter as often as you like.
⚠️ GDPR warning: Emails are only sent to contacts who have given permission to be contacted in BOTTIMMO. Contacts without permission are automatically excluded — even if they belong to the selected segment.
⏳ Depending on the number of recipients, sending may take some time.
Schedule the Sending Time (optional)
If you wish, you can schedule a specific sending time in the future. This is especially useful if the email should reach your contacts at a specific time of day, such as toward the end of the lunch break.
Right after selecting the contact segment, you can choose between:
- immediate sending or
- scheduled sending at a specific time.
💡 A few tips:
- The best open rates are usually achieved on Fridays between 1:00 p.m. and 5:00 p.m.
- If you send emails regularly, it's recommended to always send them on the same weekday at the same time.
Preview
In the final step, you’ll see a preview showing how the email will look, including your signature for the recipient. In the next step, the email is either sent immediately or saved until the scheduled delivery time.
For now, the standard signature is used. Support for custom signatures is coming soon.